

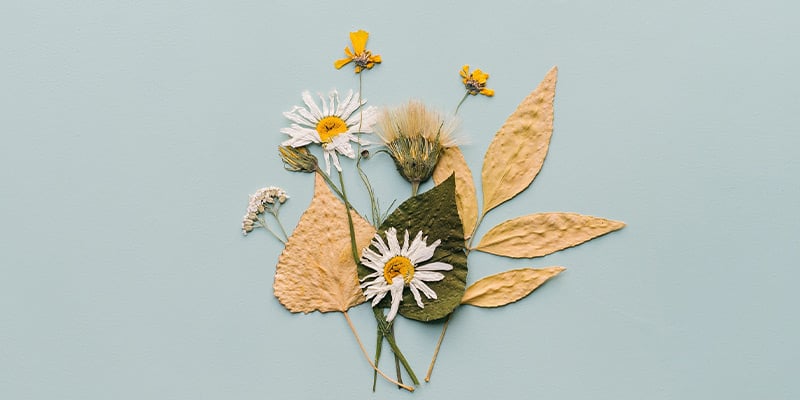
Dried or pressed, preserved flowers have a uniquely romantic quality.
Preserving a special occasion bouquet can be a great way to turn something ephemeral into a long-lasting memento, and even a family heirloom. Preserved flowers are capable of evoking the sentiment of the moment the bouquet was first gifted.
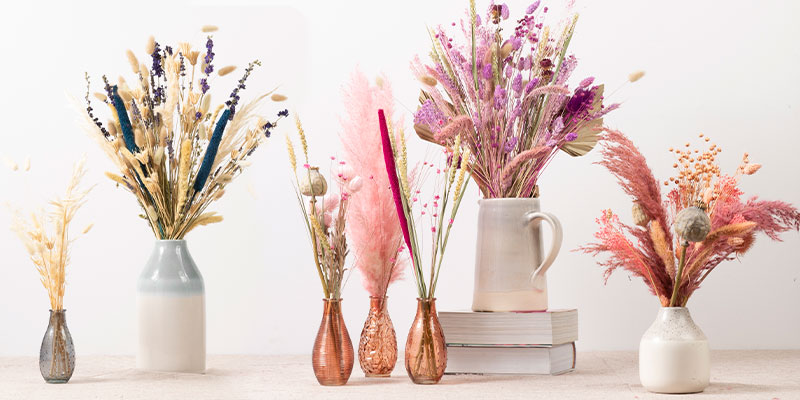
Want to enjoy some dried flowers without the extra effort? You're in luck - take a look at our gorgeous collection of professionally dried flowers and grasses.
Drying vs. Pressing Flowers
There are two main methods you can use to preserve your flowers: drying and pressing. Drying a flower will retain its shape while removing moisture that would lead to decomposition. Pressing flowers removes this moisture by literally pressing it out of the flower, leaving them paper thin.
Whether you're learning how to dry flowers or press them, there are several ways you can go about achieving your end result; each with its own benefits and drawbacks. We’ll walk you through each of these methods so that you can weigh up the pros and cons of each.
Finding the best method depends on your desired end result and the types of flowers you're looking to preserve. When deciding on a process, consider where your end product will be displayed or stored as dried flowers fade quickly in sunlight, changing temperature (and especially indoor heating!) and can be a devil to restore once dusty.
It is best to dry your bouquet as quickly as possible as a fully matured bloom is likely to lose some petals in the drying process. The longer a bouquet sits in water, the more the flowers will begin to open. Using a bloom that is just opening or cut while fully in its prime will leave you with a better end result. If you are planning to preserve a bouquet from a special occasion where you will not be able to start the preservation process quickly, you can choose long lasting blooms to ensure yourself a little bit of wiggle room before starting.
Drying Flowers
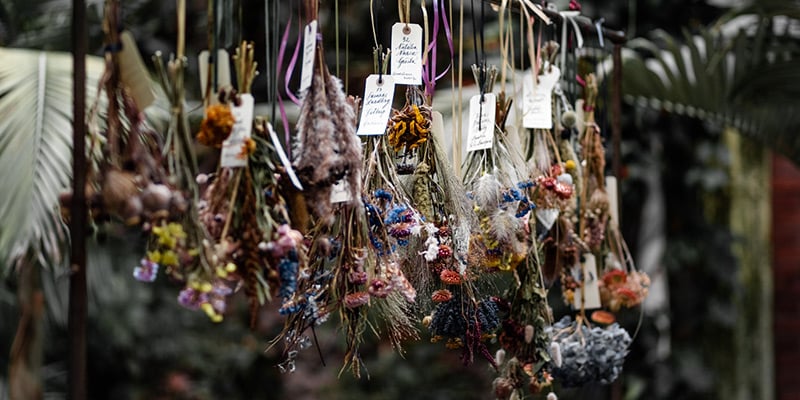
Drying your flowers will keep your bouquet most true to the form it's currently in. Once dried, you can leave your flowers as a bouquet, frame them in a shadow box, or turn them into a wreath.
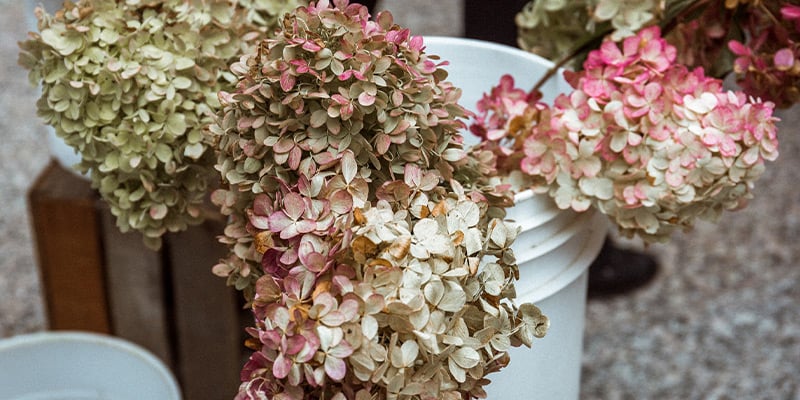
Flowers with a large bud such as peonies or roses will massively benefit from being dried rather than pressed as they are more likely to distort in the pressing process. The same is true for flowers such as hydrangeas. Any flower with a large bloom made up of lots of small petals will be difficult to arrange into a press without misshaping some of the petals.
Top Tip: Any petals lost in the process of drying can be mixed with essential oils and added to potpourri.
How Long Do Dried Flowers Last?
Dried flowers will usually last for at least a year, but often longer. The colours will fade over time, and some petals may drop. This can be reduced by keeping them out of direct sunlight, and displaying them in a dry part of your home. Avoid handling your dried flowers too much, as this can cause them to shed petals and leaves, but they can be very lightly dusted if necessary.
Best Methods to Dry Flowers
How to Air Dry Flowers
Air drying is probably the most common method used to dry flowers and is certainly one of the oldest and most traditional methods of drying flowers, which needs the least resources.
Simply cut off the excess foliage at the base of the stem, tie the bouquet together at the base and hang upside down for a couple of days. As stems are required, this does work better for flowers with longer, sturdier stems. An additional factor to consider is that flowers with a lot of pollen, such as lilies, daisies or tulips will not take well to air drying as the pollen will fall out.
This process does take a couple of days, but the flowers look delightful while drying and can add a wonderful old-world cottage feel to your home. Many learn how to dry flowers using this method because the process itself is so charming.
How to Microwave Dry Flowers
Drying your flowers using a microwave is much faster than allowing them to air dry and can help retain colour more intensely. The initial process takes only a few minutes, and they will need to finish drying untouched overnight to fully complete the process. This method is beneficial for thicker flowers with multiple petals, but flowers with delicate petals will suffer somewhat from this process.
Asides from the microwave itself, this method does also require additional equipment such as silica sand and a microwave safe container you won't be using for food again.
How to Dry Flowers with Silica Sand
To use silica sand, pour a layer of the sand into an airtight container. Trim the stems of your flowers, and place the blooms into the sand face up. Alternatively, you can dry entire stems by lying them on their side. Carefully cover the flowers and stems with the sand, making sure not to entirely bury them. Then, seal the container and wait!
This method works well with blooms with lots of petals such as dahlias, carnations, geraniums, and marigolds. By nesting them in silica gel or sand, the petals are not as disturbed throughout the drying process. The silica will need to be brushed out of the flowers, so anything with very delicate petals or a deep centre will make this process more difficult.
Fine petals of flowers such as asters will contract as they dry. Many enjoy this wispy effect it gives the petals. As the flowers need to be nested in silica, preferably facing up, this method becomes quite impractical if you wish to keep the stems.
Silica sand is extremely effective at wicking away moisture- making it ideal for speeding up the flower drying process. You may know it better from its supporting role in boxes of new shoes, electronics or at home covid testing kits. Luckily you don't have to save up hundreds of sachets: you can buy a big bag of silica gel or sand at most craft stores. As the sachets are so keen to remind us, silica gel is not fit for human consumption, so don't use this method if you want to use your dried flowers as food decoration. To be extra careful, it’s advised that you don’t dry out your flowers in a Tupperware that you will then reuse for food storage.
How to Dry Flowers with a Food Dehydrator
Not just for drying orange slices at Christmastime! Using a food dehydrator to dry flowers is great for space efficiency as you can have several layers of flowers drying at once. This method also has a fairly quick turnaround time as the dehydrator can be left running overnight and you’ll wake up with fully dried flowers. Simply lay out flowers in the trays, ensuring that there’s enough space for the air to pass between each of the flowers. Mature blooms work well, as they will lay flatter in the trays and will dry quicker, as more of the flower is exposed to the air.
The warm air of the dehydrator creates a wonderful fluffy effect for dried thistles and cornflowers. If you’re using your flowers in food preparation or decoration, this method is recommended (and of course, make sure your flowers are fit for consumption before trying this!)
How to Dry Flowers in a Vase
Vase drying is the ideal method for larger blooms as you’ll need to manipulate them less and they can basically dry themselves! This method can be great for achieving a little more vibrancy than simply air drying, while still being very low effort. All you need to do is leave the stems in a few inches of water and leave them until dry. You may have had this accidentally happen with a decorative bouquet left unattended.
This works especially well for flowers with sturdier stems, such as hydrangeas, as a more flexible stem will droop as it dries. As the stems are integral to the drying process this method is recommended for any project where you wish to keep the stems.
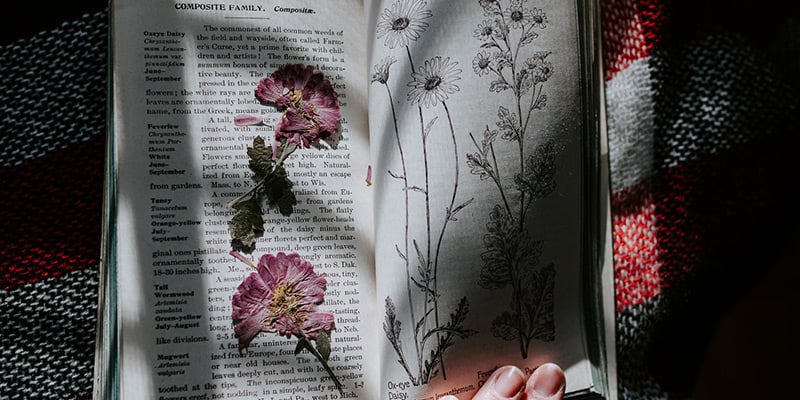
How to Press Flowers at Home
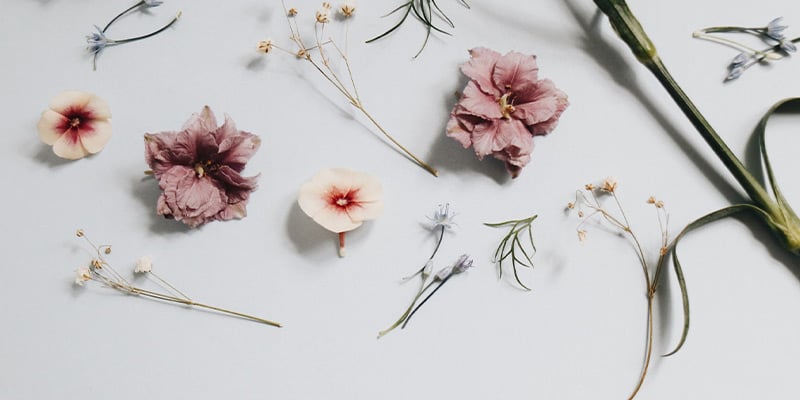
Pressed flowers also have a wonderful aesthetic quality. Unlike dried flowers, pressed flowers lose their natural shape and instead become almost entirely flat. Depending on the flower and the method used, pressed flowers can become literally paper thin, and almost translucent.
There are quite a few practical advantages to pressed flowers. Due to their flat nature, they’re easier to store, with future damage being less likely. Plus, you’re more likely to store them in a way that they won't accumulate dust; dried flowers are notoriously difficult to clean after becoming dusty due to how fragile they are.
Learning how to press flowers without creating flower origami takes a little trial and error, as the transformation is more dramatic than drying. If you’re planning on pressing a special occasion bouquet, have a few practice presses with garden flowers, or a less sentimental bouquet. For more delicate blooms such as orchids or lilies, pressing is the recommended method.
What Flowers Can Be Pressed?
When choosing a flower to press, it's important to consider the transformation from three- dimensional to paper flat. A flower with a more globed bud will need to be cut in half before pressing, or you could press only the petals. It’s worth taking a lot of extra care when placing your flowers to be pressed as the petals you can’t see when the bloom is laying down will be more visible in the final product, as the petals thin in the drying process.
What to Do With Pressed Flowers
Pressed flowers can be framed, put in a photo album or scrapbook, or used to personalise phone or laptop cases. For the more experienced crafters they can be used in resin projects or even as raw materials in printmaking or fabric dying. When using pressed flowers in papercrafts, make sure to use acid free archival paper to slow down the degradation process. If you want to combine with family photos, drawings or newspaper clippings you can buy “paper preservation spray,” or “deacidification spray” to neutralise the PH and preserve your crafts.
How Long Do Pressed Flowers Last?
Pressed flowers last for an extremely long time; in fact, there are examples of pressed flowers in museums that have lasted for centuries. In practice, you can expect them to last several decades with proper care. Simply keep your pressed flowers away from direct sunlight, and avoid storing them in areas with a lot of humidity.
Best Methods to Press Flowers
How to Press Flowers with a Book
This method is a simple one! To get started, open the book and place your parchment paper (newspaper works in a pinch!) on the pages. Place the flowers face down on the paper, and close the book. Then, simply wait around 10 days, and remove your flowers once they’re fully dried.
Many guides will recommend only using heavy books, but we’ve found that you can use almost any book - just place heavier books on top! Just make sure the weight is evenly distributed across the area of the book being used to press.
Always choose a book that you don't mind getting damaged, however. As the moisture is pressed out of the flower it can cause the pages to warp and wrinkle. This risk can be minimised by pressing onto an absorbent parchment paper or old card. Not only is there the risk of water damage, but a flower with a firmer bud can leave an indentation in the book as it is pressed.
When pressing with a book you will be more prone to petals shifting as you close the book. Heavier books tend to shift more. The thicker the book, the larger the curve in the spine, the more arch put into the pages as you turn them. Using a large scale hardback book with fewer pages (think children’s annuals) results in less bending pages. Another advantage of this is that it’s often the case that we have very few thick books we don't mind getting damaged in pressing, whereas children’s annuals pop up in charity shops more often than hefty reference books or phone books.
Choosing flowers with a few distinct petals, such as orchids and pansies, or a flower that is already quite two dimensional, like a daisy, is recommended. These flowers will have fewer variable elements to control in the pressing process.
How to Press Flowers with a Flower Press
Using a flower press will allow you more control over the pressing process than a book. A flower press is recommended for lilies and daffodils, as their iconic shape is recognisable from certain angles more than others. With these larger flowers, it may be worth considering pressing the petals separately and then reconstructing the flower once pressed.
To avoid your flowers browning, change out the parchment paper that you are using for blotting once or twice a week. As you will need to space out flowers you are pressing, a flower press gains a large advantage over books here as it simply takes up a lot less space.
How to Press Flowers with an Iron
Pressing flowers with a book or a press will take three to four weeks. An iron, however, will cut your pressing time down to minutes. This is great if you want a quick turnaround, or don’t have the space to leave a pile of heavy books sitting around for a month.
To do this, lay your flowers between two pieces of parchment paper. Turn on your iron, and hold it over the flowers for around 10 seconds. Let them cool, then take a look at the results!
This method, while fast, does yield a slightly different result to the others. Rather than press the flowers entirely flat, the pressed flowers can come out with ripples in them; rather like water damaged paper. Different parchment papers can yield slightly different results, but the rippling effect is often hard to avoid. The uneven heat distribution from the iron can also lead to uneven bleaching of the flowers, with some areas losing far more colour than others.
If you are preserving your bouquet to keep as a memento, the time invested in the previous pressing methods really pays off. If you are preserving the bouquet to use pressed flowers in a quick craft project, the time saved in ironing them is worth the pay-off for the slightly lower quality results.
Preserving Flowers: Which Method Is Best?
In short, there isn't one “best method.” This really depends on what you plan on doing with your bouquet, what kind of flowers you have, and how you wish to preserve them. If you want to keep them three dimensional, with long stems- opt for air or vase drying, depending on your blooms. If you wish to frame them for longevity, opt for a book or flower press, depending on the space you have available and the size of bloom you are pressing. Hopefully our guide has given you the advice and resources to make this choice.
Before preserving a sentimental bouquet, it may be best to experiment with a few different methods to get an understanding of what works for you. Some you may enjoy the process, but dislike how the results look after a few months. Each method truly has its own advantages and disadvantages, so the best method for you is as unique as the bouquet you are preserving. A flower subscription for your home will keep you well stocked in bouquets to practice flower pressing and drying.
Good luck, and happy flower preserving!


 Loading...