
It may sound daunting, but repotting a plant doesn’t have to be complicated. Our simple guide to repotting is easy-to-follow, whether you’re green fingered or new to the gardening world.
Our tips and tricks will help your plant thrive, whether you’re repotting into a new planter, or just want to refresh the soil in your current pot.
Here’s everything you need to know about repotting a plant, from the right time to repot, to preparing for the switch, and a step-by-step guide on how to do it.
Why do plants need to be repotted?
There are a number of reasons why you may need to repot your plant. As your plant grows, the roots expand so that it can continue to soak up all the water and nutrients it needs. If your plant is in a pot that’s too small, it will struggle to absorb these nutrients.
You’ll also find that indoor plants live in potting compost which is enriched with nutrients, however as time goes on this soil needs a refresh to allow your plant to continue to thrive.
Usually you’ll only need to repot your plant every one to two years to give it a little more space to grow and freshen up the soil. It’s recommended that you always repot into a pot with holes at the bottom to support drainage.
How do I know when it’s time to repot a plant?
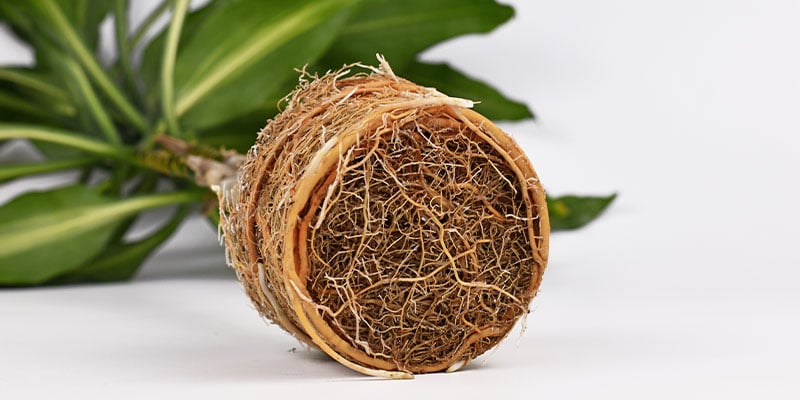
There are a few signs to look out for that will tell you if it’s time to repot your plant. If your plant looks like it’s too big for your pot, or you can see the roots poking out from the top of the soil or through the drainage hole, then it’s time!
Roots pushing the plant up and out of the pot is another sign. You can also check if the roots are struggling for space by lifting the plant carefully from the planter to see if the roots are binding in a circle, which is a sign the plant has become rootbound.
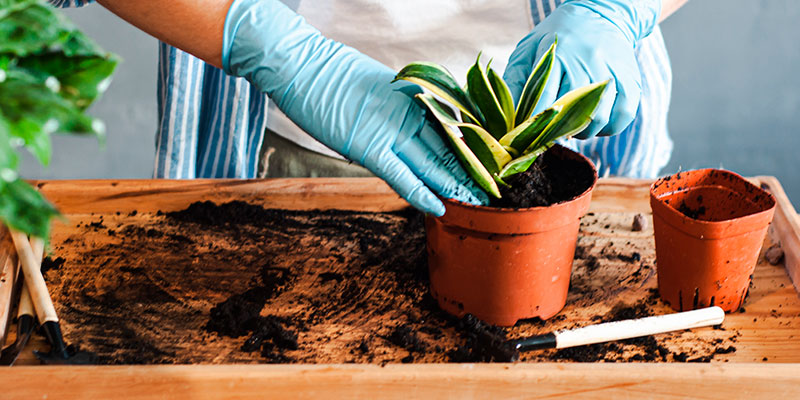
When it’s time to repot, you’ll need a plant pot that’s larger than your current one (around 1-2 inches wider), and fresh potting soil suitable for your plant type. It’s also useful to have a trowel and gloves to hand.
How to repot a house plant: Step by step guide
1. Prepare
Preparation is key. Experts say it’s best to repot plants just before the active growing season so aim for late winter or early spring.
When repotting houseplants, you should always use a potting compost suitable for your plant.
A few days before repotting your plant, be sure to water it. This will help the plant stay healthy and make it easier to remove from its current pot and place it into its new home.
Choose a pot that’s 1-2 inches wider than your current planter. Experts suggest using a pot with holes at the bottom to support drainage, otherwise your plant can easily drown if it’s overwatered.
2. Remove the plant from its container
Now it’s time to get to work! Carefully remove your plant from its current pot. If this is challenging, try turning the planter on its side. Once removed, gently loosen the roots with your fingers so they don’t end up stuck together with soil in your new pot. If the roots are growing in tight circles at the base of the plant, carefully unbind them and trim if needed.
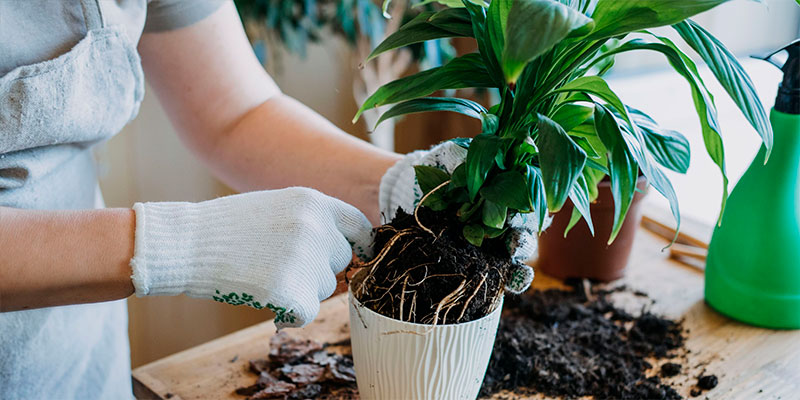
3. Repot your plant in its new planter
Add fresh potting soil to the bottom of your planter, packing it down tightly before placing your plant on top in the centre. Fill your new pot with soil around the edges. To avoid your plant into shock, wait a few days before watering.
Give your plant a few weeks to settle into its new home, keeping a close eye without overwatering it.


 Loading...